

How To Change Green Screen Background In Photoshop Cc
Always dreamed of teleporting yourself direct to the tropical beaches of Seychelles? Or, perchance, to the top of Mountain Everest? Well, fifty-fifty in the era of locked borders and lockdowns it'southward possible – thanks to modern photo editing programs and the green screen engineering. Larn how to remove the green screen in Photoshop© by Adobe. From now on, you'll be able to easily supercede the background on any photo in no time!
How to Remove Green Screen in Photoshop© by Adobe
If you lot are looking to chief the art of removing the background or greenish screen in a photo, read on! We are here to make your life a little bit easier by walking you through the essential steps. First up, we will find the functionalities of Adobe© Photoshop©. After that, we will introduce you to some other photo-editing tool, Picverse past Movavi, which is a lot easier than the professional-form application from Adobe – but withal allows achieving amazing results.
Adobe© Photoshop© has been around for quite a while. Information technology offers an extensive collection of professional photo editing tools. Every fourth dimension a new version comes out, nosotros meet the efforts the developers made to make the program more user-friendly and simplify the steps. But keep in mind that information technology is still quite technical. On the other hand, the results yous go worth spending a couple of hours figuring out how it all works.
The steps below are based on the 2020 version. If you accept already upgraded to Adobe© Photoshop© 2021, you may detect some additional shortcuts. Other than that, the instructions are mainly the same.
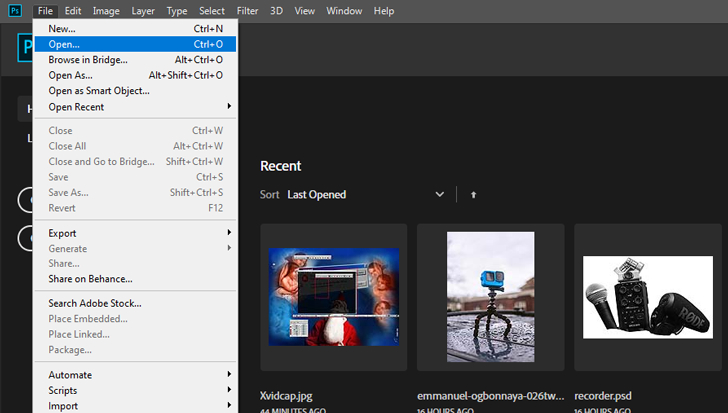
Step 1. Open up the picture with Adobe© Photoshop©
Offset the app. Go to File > Open and scan to observe your photo.
Step two. Go to the Color Range settings
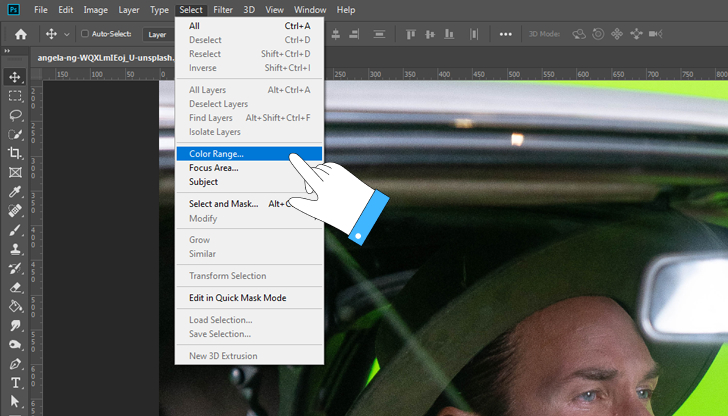
In the card bar, striking Select. In the dropdown menu hitColor Range. The color range dialog box will pop up.
Pace 3. Take the Eyedropper tool
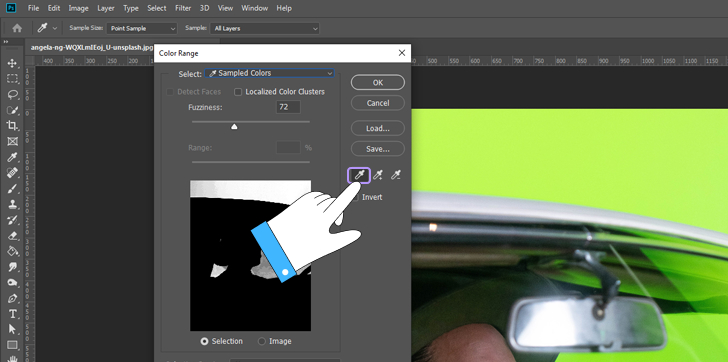
In the Select bar, choose Sampled Colors . You will see your image in the Color Range preview window go dark. Hover the mouse over your image, and the eyedropper will appear. Hold downwards SHIFT while you click and drag the eyedropper on the green surface area you desire to erase. In the Color Range preview window, yous will come across the background progressively go white while the subject is silhouetted and stays black.
Step iv. Use the Fuzziness slider
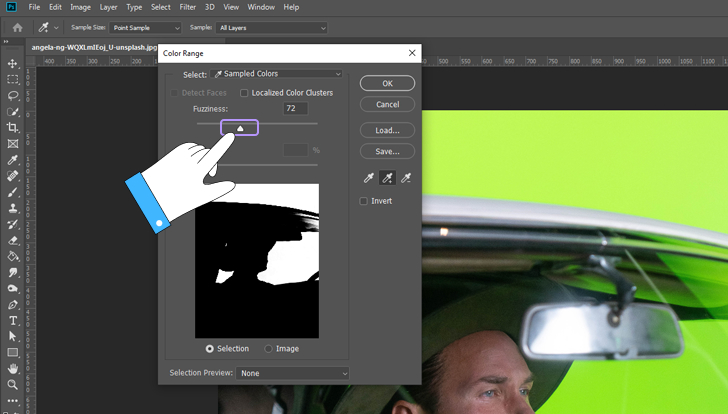
Click on the slider and take it upwardly to fifty-100 to double-check that you haven't missed any sections of the background. If you see any grey areas, proceed to laissez passer the eyedropper in the spots that require more attending.
Step five. Cheque the Capsize box
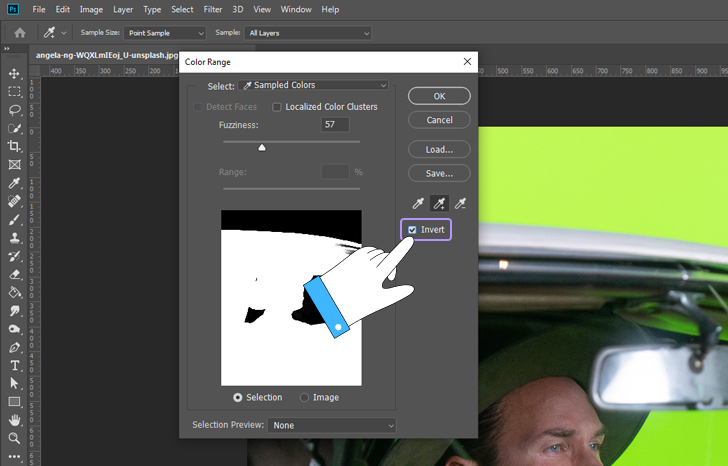
This volition ensure that your choice is applied to the subject in your image and not the background. Click OK when the preview looks expert. The subject has a dotted line around the image, which shows it has been selected and clipped out of the groundwork (and not the other way circular).
Footstep 6. Create layer mask
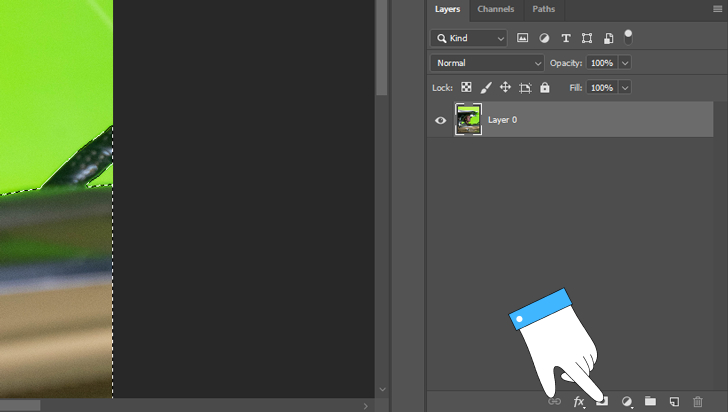
Click on the layer mask icon to remove the groundwork. (Yous can actually create multiple layers, but allow's focus on removing the light-green screen this time. If you want united states of america to make a guide to Adobe© Photoshop© layers, let us know).
Footstep 7. Erase the color cast
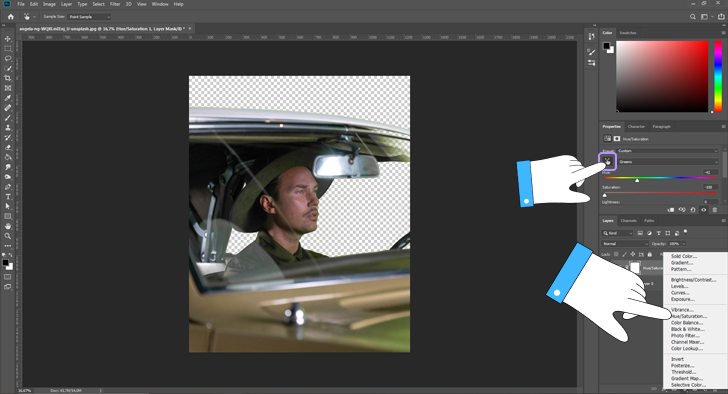
If you have a light-green reflection on your subject due to poor lighting (also known as green spill), you demand to remove it. On the left side, click on the Quick Choice tool and so paint over the area that needs it. Go to the Hue/saturation adjustment layer, select the color of the reflection (greens) and click on the Saturation slider to remove the colour cast.
Step 8. Refine the prototype
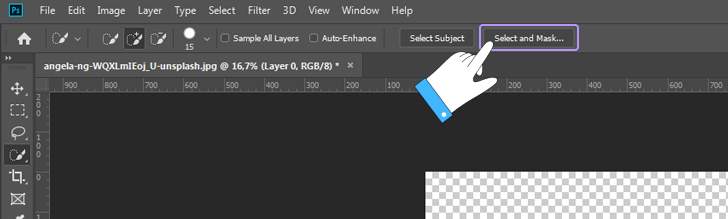
Once yous have removed the background, refine your subject. Click select and mask. Choose the near adapted View.
ix. Terminate it off
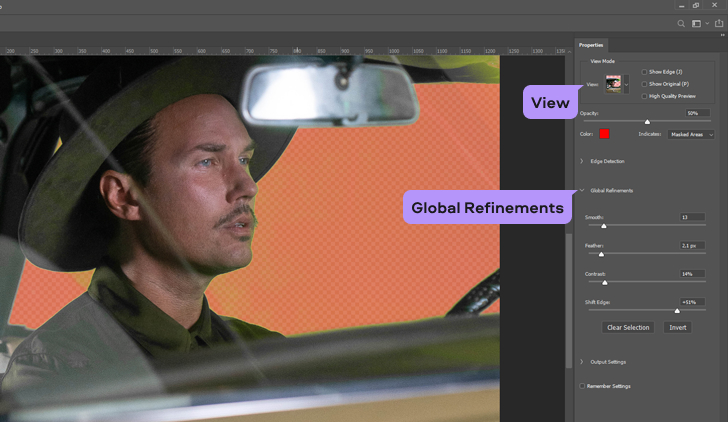
Utilise the Global Refinements sliders – Smooth, Feather, Contrast, and Shift Border – to smooth the edges. Click OK and Save.
A simpler culling: Picverse by Movavi
Movavi's Picverse is a simple AI-driven photograph editing tool. The app boasts a very straightforward and intuitive interface, which makes it suitable even for the very beginners. On the other paw, Movavi Picverse boasts powerful features and volition exist a good help for professionals besides. Allow united states of america show how you tin can remove and change the background of a picture in five easy steps with Picverse past Movavi .
Footstep ane. Open the photo of your choice
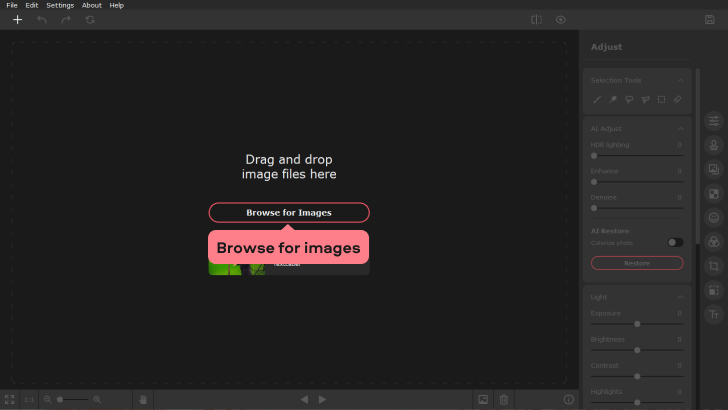
Click Browse for Images to import files. You can also drag and driblet them to the app.
Step 2. Crop out the background
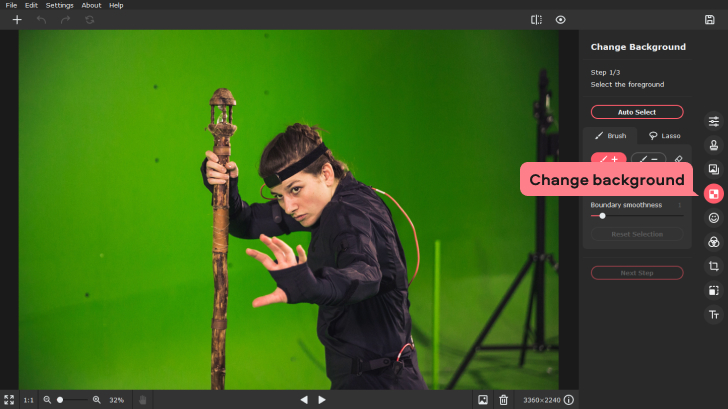
Go to theChange Groundworktab. Use theBrush tool to manually select your object and separate it from the background. You can also hitMotorcar Selectand let the program do the job for you.
Footstep iii. Smooth the Edges
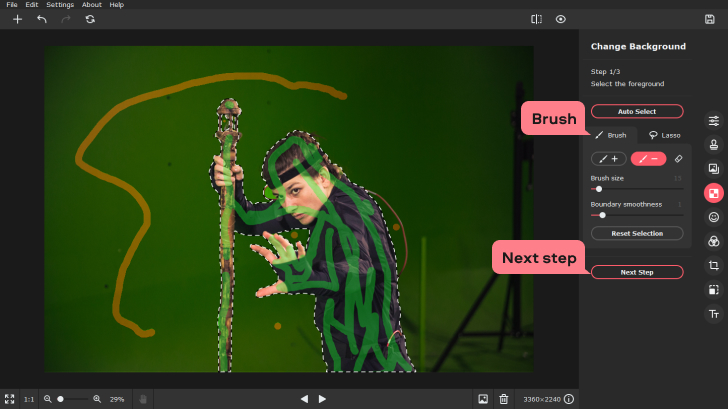
Use the Foreground castor (green) to select the object or objects that yous desire to stay on the picture show. And then use theGroundwork brush(blood-red) to marker the background that should be removed. Striking the Next Stepbutton.
Pace 4. Remove or replace
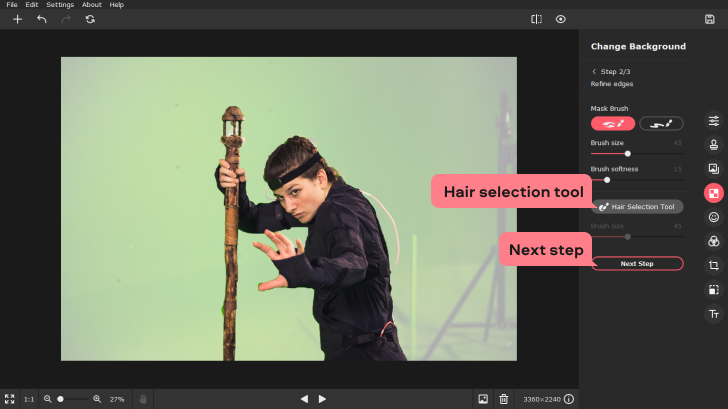
Use the Hair Selection Toolon images of people to make the fine details clearer. Press the Next step button over again.
Stride 5. Supercede the groundwork
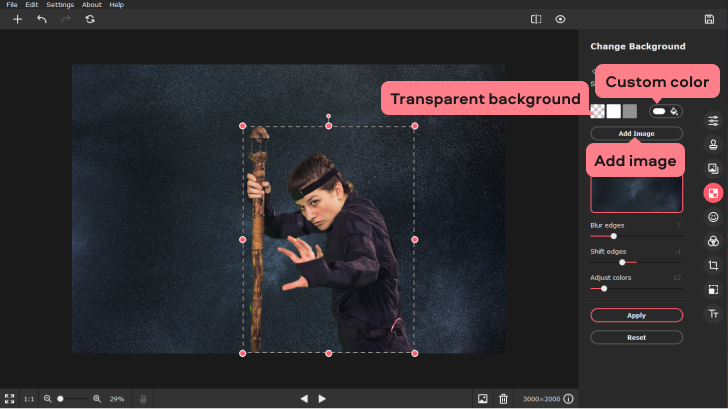
To take out the background completely, click T ransparent background . If y'all want to add a background of your own, hitAdd image, and soUpload to import your file. Yous can also cull an image from our collection. Use the sliders for blending or sharpening edges.
Step half dozen. Finish upward
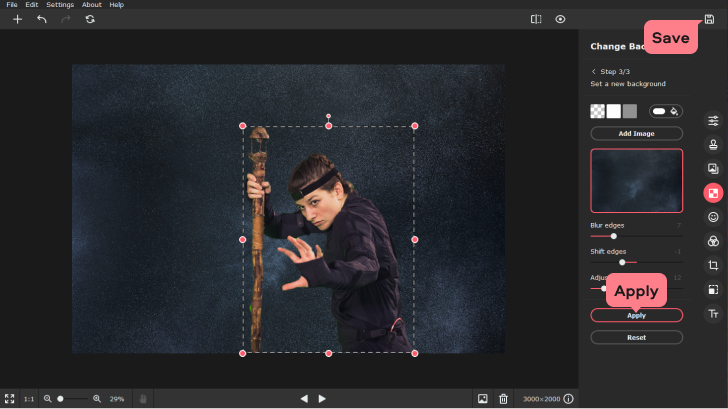
When everything looks skilful, hit Apply , and so the disk icon. Cull the format and and then click OK.
After examination driving both these photo-editing tools to replace the background, you tin clearly see how they differ. Adobe© Photoshop© offers a multitude of options to heighten and alter your paradigm. It is more than technically advanced and probably requires some preparation to really accept full advantage of all its functionalities. On the other hand, Picverse by Movavi offers excellent results only is more attainable for beginners or amateurs. It is less technical in its approach and more user-friendly in its interface – without affecting the quality. Both options offering excellent quality, but the attempt and technical capabilities required to achieve them are not the same.

How To Change Green Screen Background In Photoshop Cc,
Source: https://www.movavi.io/remove-green-screen-in-photoshop-en/
Posted by: grosswascond.blogspot.com
0 Response to "How To Change Green Screen Background In Photoshop Cc"
Post a Comment