

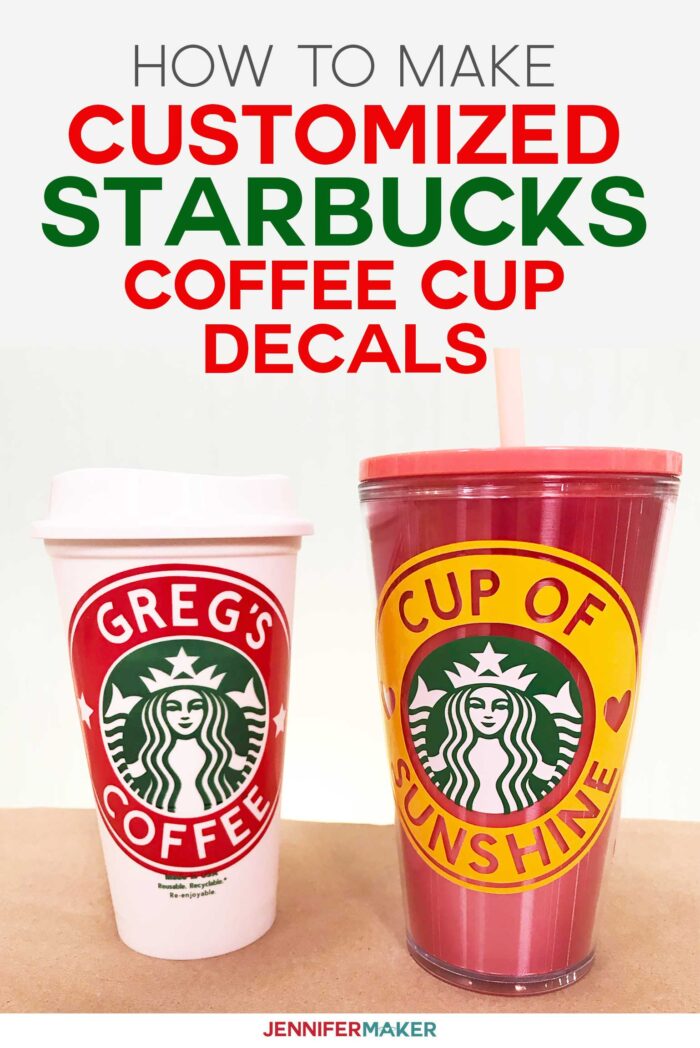
How To Personalize Starbucks Cold Cup
Learn how to make your own DIY customized Starbucks cups in this stride-past-footstep tutorial. These personalized and reusable cups are great for gifts, parties, and special events!
I. Love. Coffee. In fact, I accept no shame in admitting that it's coffee that's fueling my productivity this month … well, that and your enthusiasm, of course! (Thanks!) Many people share my love for coffee, and Starbucks java in particular. In that location's ane simply five minutes from my firm. The baristas at that place may or may non recognize united states past our order and our voices in the drive-through lane. Again, no shame! If you're a Starbucks coffee lover similar me, or know one, I have a fun project for you lot — a personalized Starbucks cup! And so for Mean solar day 14 of The Great Maker 25-Day Souvenir-Away Challenge, I am showing yous how to make your ain DIY customized Starbucks cups that you can wash and re-use over and over!
What is The Groovy Maker 25-Twenty-four hour period Gift-Away? This is an annual tradition hither at JenniferMaker! Every day for the offset 25 days of Dec, we gift y'all with a brand new projection, design, tutorial, and video for something You lot asked us to make. On peak of that, we host a giveaway with 25 prizes, everything from Cricut cutting machines (four of them this yr!) to project prize packs with all the materials for popular JenniferMaker projects to cute print editions of our popular Cricut Omnibus Playbook. Y'all can even earn bonus entries for making the daily projects! Click here to learn more about The Groovy Maker 25-24-hour interval Souvenir-Away!
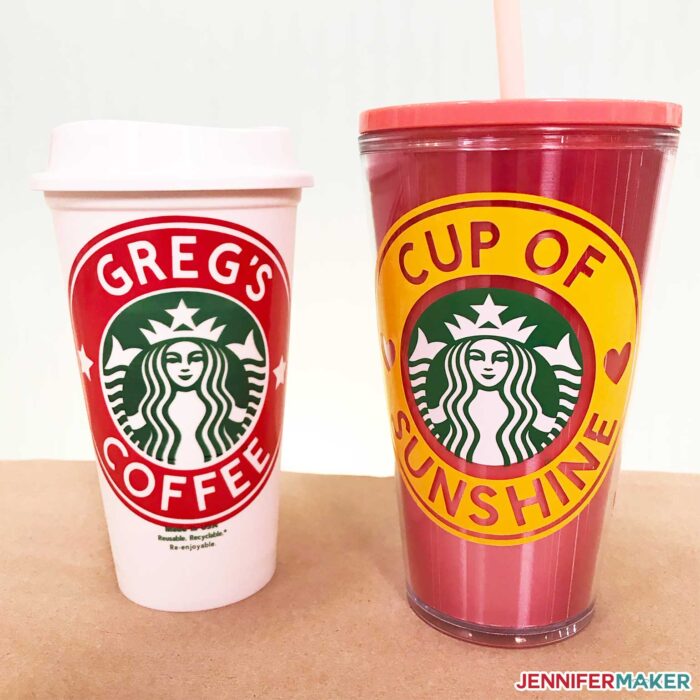
I've designed my customized Starbucks decals in two ways. Either you can only put a personalized ring around the existing Starbucks logo that's preprinted on Starbucks cups, or y'all can create a full decal from scratch and put it pretty much anywhere you want … even on something like a pretty glitter tumbler. My decal has a crafty lady on it instead of a mermaid, because crafty is as skillful every bit coffee! So yous get to choose which decal type works best for you.
Now, a couple of things near the Starbucks decal rings. Outset, while some of the Starbucks logos on the cups are perfect circles, most are not. So y'all'll want to measure your logo to know its exact dimensions and whether or non information technology's a circle or an oval earlier you make your ring. I will show yous how to practise that, as well as how to resize a ring to fit your loving cup'southward logo size. I have complimentary ring patterns for both the perfect circle logos and the oval logos.
Second, the real fun of this projection is personalizing the ring with a proper name! So I will show y'all how to practice that in Cricut Pattern Infinite using the built-in Curve Text feature on the Desktop version. Just don't worry — I won't leave out those of you who are on iOS and Android which practise not currently have the Curve Text feature in their versions of Design Infinite. I will show yous some other fashion to bend text inside Design Space.
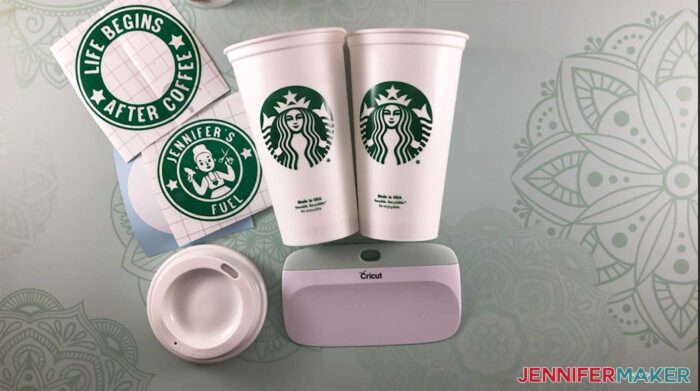
For this project, I'g primarily using 16 oz. reusable plastic Starbucks cups (the Grande size). I've also put the decals on various other Starbucks cups I establish so you can see how that works, too!
See exactly how to make these Starbucks style to-become java cups in my tutorial video (or go along scrolling if you lot adopt a pace-by-step photo tutorial):
The designs for the cup decals are free on my blog! And then let me evidence yous how to find them and so you can brand your ain! Yous can customize your own or use my gratuitous files!
Ready to brand your own DIY customized Starbucks cup? Permit's do this! This post contains some affiliate links for your convenience (which ways if y'all make a purchase after clicking a link I will earn a small commission just it won't cost you a penny more)! Read my full disclosure policy.
Materials to Make DIY Customized Starbucks Cups
View my Amazon shopping list with the exact items we used to make this project!
- Something to put your vinyl decals on, such equally:
- Hot/Cold Plastic Starbucks Cups, 16 oz. Grande size (y'all can buy a bunch of them at once)
- Common cold Drink Starbucks Tumblers, 24 oz. Venti size
- 2019 Wintertime Vacation Holographic Cup 16 oz Grande size
- A plain white ceramic or stainless steel tumbler
- A glitter tumbler (see my glitter tumbler tutorial here and my ombre tutorial here)
- Permanent agglutinative vinyl in the color(s) of choice (Ane logo is nigh 4 inches in bore)
- Weeding tools (scraper tool, spatula and weeding tool)
- Transfer Tape
- StandardGrip cutting mat (the 12″ ten 12″ size)
- A way to cutting your permanent agglutinative vinyl (I used the astonishing Cricut cutting motorcar!)
- Design #179 – My free SVG blueprint files and template (available in my gratuitous resources library—go the password by filling out the form at the bottom of this page)
How to Make Customized Starbucks To-Go Coffee Cups!
Stride 1: Get My Costless Starbucks Cup Decal cut files
My complimentary customized Starbucks cup SVG cut files are ready and waiting in my library for yous. Become the free Starbucks cup files (Design #179) from my free resources library (get the password to the library in the course at the bottom of this post).
Stride 2: Upload the Starbucks Decal Files to Cricut Pattern Infinite.
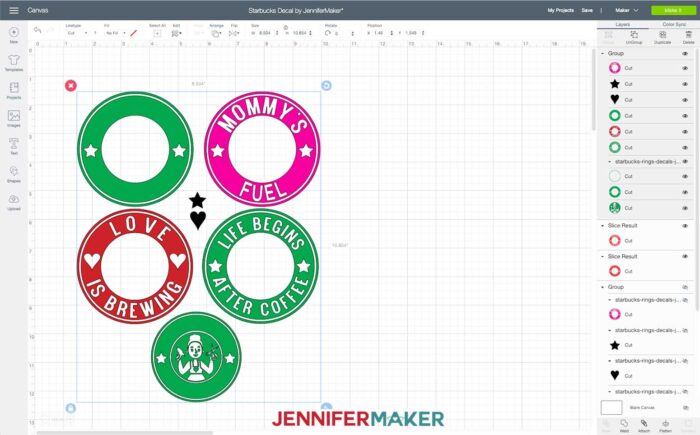
Hither is what the Starbucks Decal SVG cut file volition look like when y'all upload it to Cricut Design Space :
Tip: If you're non sure how to upload an SVG cutting file to Cricut Blueprint Space, sentinel this helpful video training series I fabricated. If you're on an iPhone or iPad, hither's how to download and upload SVG files to the Cricut Design Space app.
Decide which of the designs you want to utilise and hibernate or delete the rest.
To exercise this, with the designs selected, click on the ungroup push button, and then select each design yous don't need and either click the crimson Ten to delete or click the middle for that design in the layers console to hide it.
The logos are sized accordingly for the 16 oz. to-go travel cup (the "Greg's Coffee" cup in the video). If y'all utilise a dissimilar cup, yous will probably accept to size the logos to the dimensions needed for your loving cup.
The logos that are designed with no heart volition be slightly larger in size to embrace the Starbucks lady on the cup.
To completely embrace all of the Starbucks design on the cup, you will need to cut a solid white circle to utilize with the Crafty Lady logo.
This will allow you to have a solid white background to lay the logo on before applying it to the loving cup.
Step three: Mensurate Your Starbucks Logo and Resize Your Rings
Information technology's important to mensurate your Starbucks logo, because they aren't nevertheless size or shape on all the cups. Seriously! Some are perfectly round, others a little ovalish. So measure both the width and elevation. If the two numbers are the same, use the "circle logo" files. If the two numbers are unlike, employ the "oval logo" files.
Pace four: Customize the Rings with Your Proper name or Text!
If you're non using the pre-designed logos in the file, you lot can put the words you want to use on the blank logo and slice them out.
To get a skilful view of the logo, zoom in on your blueprint using the plus sign in the lesser left hand corner of the Design Infinite window.
Click on the Text Tool to begin typing the words that you want on your logo. I recommend uppercase letters. I used Cricut Sans Bold for my Greg'south Pattern.
With the Crafty Lady logo nevertheless grouped, place the word(due south) y'all are going to use on the top half of the logo over the logo.
With the word(s) still selected, use the bend push button to shape the word into a curve to fit on the logo peak half.
You may also desire to adjust the letter spacing using the Letter Spacing push button.
Adjust the overall size of the word(s) if needed to go a good fit within the pinnacle half of the logo.
Follow the aforementioned steps above to get the word(due south) that you want on the bottom half of the logo.
Once y'all have your words the size you desire and in the place you lot desire them on the logo, you will desire to slice the words out of the logo then the white of the cup can be seen through them.
To do this you will demand to select the top give-and-take(s) and the logo together (click on the elevation words first with the mouse, hold down the shift fundamental on the keyboard and click on the logo layer the give-and-take(south) are on). With both objects selected, the piece push at the bottom of the layers panel volition get agile. Click Piece. (If the Piece button is non active nigh likely yous may have more than the two layers selected).
Delete the layers that were sliced out (usually ii layers, the words and the pieces of the logo removed).
Follow the aforementioned steps to remove the word(s) from the bottom one-half of the layer. Afterward deleting the sliced out images, select the whole logo and click the ATTACH button on the lesser of the layers console to keep everything together when cut.
Step 5: Cutting Your Vinyl
Using a dark-green StandardGrip mat, place your permanent vinyl Face up the cutting mat. Recollect to select the proper cut cloth, and load your fine-point blade into your Cricut machine.
Notation: Not sure which side of the vinyl goes down on your mat? Read my guide hither!
Step vi: Weed Your Cut Design
One time cutting, carefully weed the excess vinyl from your decal using a weeding tool.
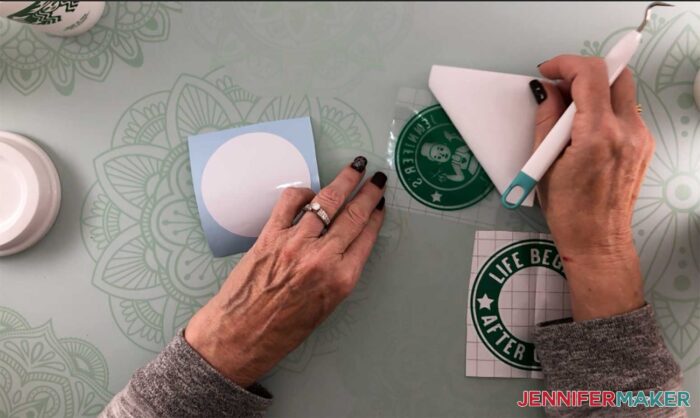
Once your design is weeded, apply regular transfer tape to the Crafty Lady logo. Use your scraper tool to become a good adherence between the vinyl and the transfer tape. Remove the paper backing off your Crafty Lady logo vinyl decal.
Step 7: Apply the Logo to the Cup
Lay the Crafty Lady logo vinyl design on top of the white circumvolve and use your scraper tool to attach the two layers together.
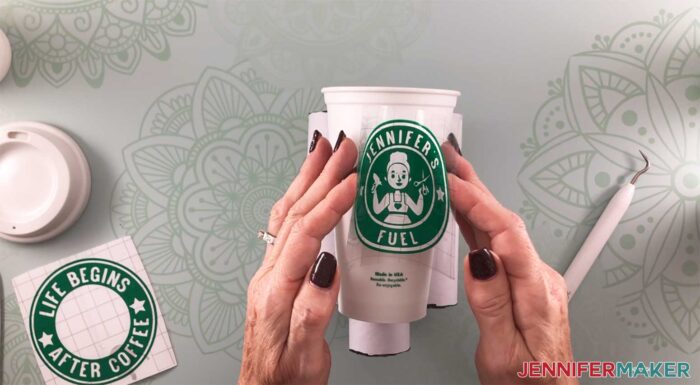
To minimize bubbling, bring the two sides of the logo together so the middle of the logo can be laid downwards on the cup offset.
![]()
![]()
Scroll one side of the logo downwards on to the cup at a time.
![]()
![]()
Step 8: Shine out the Design on the Cup
Use the scraper tool to smooth out the blueprint and get a good adherence to the cup.
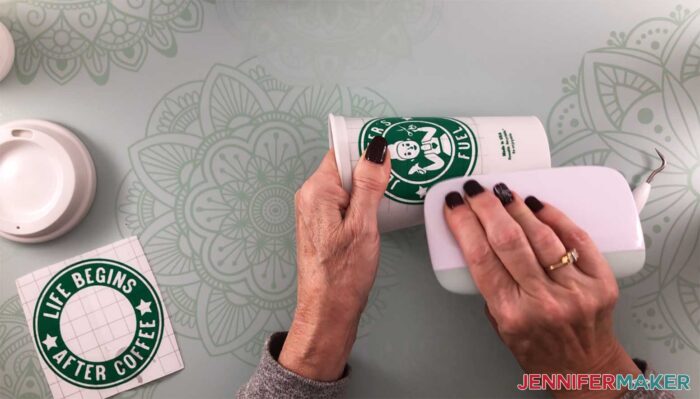
At present you tin can remove the transfer tape and the vinyl blueprint should stay on the cup! And that'south it! Now make yourself some java and have a pause!
I advise handwashing your cups to prolong the life of the vinyl on the loving cup.
Become my free DIY Customized Starbucks Cup designs and SVG cutting files
I'd love to see your customized coffee cups! If you brand some, please share a photo in our Facebook grouping, electronic mail it to me at [e-mail protected], or tag me on social media with #jennifermaker.
Dear,

Desire to recall this? Save the DIY Customized Starbucks Cup Tutorial to your favorite Pinterest board!

How To Personalize Starbucks Cold Cup,
Source: https://jennifermaker.com/diy-customized-starbucks-cups/
Posted by: grosswascond.blogspot.com
0 Response to "How To Personalize Starbucks Cold Cup"
Post a Comment